Context란

Context는 안드로이드 시스템에 대한 인터페이스 역할을 하는 객체이다.

흠…?


좀 더 쉽게 풀어보면, Context는 어플리케이션 리소스, 파일, 시스템 서비스 등에 접근할 수 있는 메소드들을 갖고 있다. 그래서 앱의 resources나 File과 같은 시스템 자원에 접근하거나 새로운 Activity 실행, Intent 수신과 같이 애플리케이션 레벨의 작업을 요청할 수 있다.

또한, Context는 추상 클래스이며 구현체는 안드로이드 시스템에 의해 제공된다

Context 쓰임 정리

  • 앱의 리소스에 접근: res, assets, internal storage
  • 컴포넌트 통신: 액티비티 시작, Intent 수신 등
  • 시스템 서비스에 접근: SystemServices
  • 앱 정보에 접근: ApplicationInfo
  • GUI 작업: ex: AlertDialog.Builder(requireContext())

실제로는 훨씬 다양한 상황에서 사용된다!


Context의 종류 (feat. 계층 구조)

Context의 클래스 계층 구조를 보면 재밌는 사실을 확인할 수 있다.

https://medium.com/swlh/context-and-memory-leaks-in-android-82a39ed33002

(1) Application, Service, Activity 모두 Context를 상속받고 있다. Activity가 Context 자리를 this로 대신할 수 있었던 이유가 이것이었다.


(2) Context는 Activity, Service, Application 등 종류가 나뉘어 있다.

앱 안에는 여러 Activity와 Service가 존재할 수 있으므로 Activity Context는 여러 객체가 있을 수 있다. 반면, Application은 하나라서 Singleton으로 앱 내에서 하나만 존재한다.

즉, Context는 종류가 나뉘며 각각이 다른 생명주기를 갖고 있다. 따라서, 올바르지 않은 Context를 사용할 경우 메모리 누수가 발생할 수 있다.


Context와 Memory Leak

Context는 크게 ApplicationContext와 나머지 Context, 그중에서도 Activity Context로 나눌 수 있다.

Application Context

ApplicationContext는 Applicaton 생명주기를 따르는 싱글턴 객체이다. 따라서, 앱 전역에서 사용될Context가 필요하다면 ApplicationContext를 사용하자. (ex: RoomDatabase 객체 생성, 싱글턴 객체 생성)


싱글턴(or 액티비티 생명주기를 넘어가는) 작업에 Activity Context를 사용할 경우 메모리 누수가 발생하므로 주의해야 한다! Activity가 종료되더라도 다른 객체에서 Activity를 Context로 참조하고 있다면 garbage collector가 메모리를 해제할 수 없기 때문이다.

Activity Context

Activity Context는 Activity의 생명주기에 종속되어 있다. 따라서, Activity 생명주기 내에서 사용될 Context가 필요하다면 Activity Context를 사용하는 것이 좋다.


특히, GUI 작업을 한다면 반드시 Application Context가 아닌 Acitivty Context를 사용해야 한다. (ex: 다이얼로그 생성, Toast 출력) 왜냐면 Acitivty의 Theme과 같은 고유한 정보는 해당 Context만이 갖고 있지 때문이다. 다른 Context를 사용할 경우 예상과 다른 결과를 보게 되거나 crash로 앱이 종료될 수도 있다.

정리

  • 앱 전역에서 사용될 Context가 필요하다 → Application Context
  • 액티비티 생명주기 내에서 or GUI 작업에 사용할 Context가 필요하다 → Activity Context

부록) Context를 가져오는 방법

1. Activity

액티비티가 Context 그 자체이므로, this로 Activity Context에 접근할 수 있다.

2. Fragment

context or requireContext 를 통해 Fragment를 hosting하는 Activity Context에 접근할 수 있다.

3. View

view.context 를 통해 View가 포함되어 있는 Activity의 Context에 접근할 수 있다.

4. ContentProvider

ContentProvider 클래스 안에서 context 를 통해 Application Context에 접근할 수 있다.

5. Application Context

각 Context에서 applicationContext을 통해 Application Context에 접근할 수 있다. (ex: context?.applicationContext)


정리

Context는 안드로이드 시스템과 통신할 수 있는 인터페이스로, 앱 리소스, 시스템 작업, 컴포넌트 통신 등을 요청할 수 있다.

Context는 크게 Applicaton Context와 Activity Context로 나눌 수 있는데, 상황에 적절한 것을 사용하지 않으면 메모리 누수나 앱 크래시가 발생한다. 앱 전역에서 사용된다면 Applicaton Context를, 액티비티 내에서 유효하거나 GUI 작업에 필요한 것이라면 Activity Context를 사용하자.


참조

개요

보통 인터넷이나 리소스 파일의 이미지 크기는 우리가 보여줄 ImageView의 크기보다 큰 경우가 많다. 만약 원본 이미지를 그대로 ImageView에 로딩한다면, 불필요하게 높은 해상도의 이미지로 메모리를 낭비하게 된다. 게다가, Bitmap은 메모리를 많이 차지하므로 Out Of Memory가 발생할 수도 있다.


예를 들어, 129x86 pixel의 썸네일 ImageView에 1024x768 pixel 이미지를 로딩한다고 생각해보자. Glide에서 사용하는 RGB_565 포맷으로 129x86 pixel을 Bitmap 변환하면 129862byte = 22KB가 된다. 그러나 1024x768 pixel은 1.5MB가 된다. 이런 썸네일이 리스트로 사용된다면 꽤 문제가 될 것 같다.


따라서, 이미지를 메모리 효율적으로 로딩하려면 크기를 줄여서 Bitmap으로 변환하는 과정이 필요하다.

1. 원본 이미지 크기와 타입 읽기

BitmapFactory는 다양한 이미지 리소스로부터 Bitmap을 생성하는 메서드를 제공한다. decodeByteArray(), decodeFile(), decodeResource()등이 있다. 이러한 메서드로 디코딩을 하면 메모리에 Bitmap이 바로 할당된다.


그러나 BitmapFactory 클래스는 이미지의 메모리 할당을 피하면서 크기와 타입 정보를 알 수 있는 기능을 제공한다. BitmapFactory.Options를 사용하면 메타 데이터를 읽고, 수정을 할 수 있다.

inJustDecodeBounds 속성을 true로 설정하고 이미지 데이터를 Bitmap으로 변환하면, Options에 Bitmap 메모리 할당 없이 메타 데이터만 생성된다.

val options: BitmapFactory.Options = BitmapFactory.Options()
options.inJustDecodeBounds = true
BitmapFactory.decodeResource(resources, R.id.myimage, options)
val imageHeight: Int = options.outHeight;
val imageWidth: Int = options.outWidth;
val imageType: String = options.outMimeType;

2. 이미지 크기 줄이기

원본 이미지의 크기를 알았으니, ImageView의 면적을 바탕으로 크기를 줄일 것인지 결정할 수 있다.

크기를 줄일 땐 inSampleSize 속성을 사용하는데, 이것은 압축할 정도를 뜻한다. 예를 들어, inSampleSize = 4라면, 4x4개의 pixel을 한 개의 pixel로 합친다는 의미로 메모리는 1/16만큼 줄어든다.

아래는 inSampleSize를 결정하는 코드와 설명이다. 자세한 내용은 Android Developers에서 확인할 수 있다.

코드)

fun calculateInSampleSize(options: BitmapFactory.Options, reqWidth: Int, reqHeight: Int): Int {
    // Raw height and width of image
    val (height: Int, width: Int) = options.run { outHeight to outWidth }
    var inSampleSize = 1

    if (height > reqHeight || width > reqWidth) {

        val halfHeight: Int = height / 2
        val halfWidth: Int = width / 2

        // Calculate the largest inSampleSize value that is a power of 2 and keeps both
        // height and width larger than the requested height and width.
        while (halfHeight / inSampleSize >= reqHeight && halfWidth / inSampleSize >= reqWidth) {
            inSampleSize *= 2
        }
    }

    return inSampleSize
}
  1. reqWidth, reqHeight: 요구(ImageView) 크기
  2. inSampleSize = 1로 설정 (최소 값이 1임)
  3. 일단 원본 width, height를 2로 나눈다 ⇒ halfWidth, halfHeight
  4. halfWidth와 halfHeight를 inSampleSize로 나누고, 요구 크기와 비교한다.
    1. 요구 크기보다 크거나 같다면, inSampleSize를 증가시켜도 된다는 뜻이므로 2배 증가시킨 후 4번 과정을 다시 진행한다.
    2. 나눈 너비와 높이 중 요구 크기보다 작은 값이 하나라도 있다면 inSampleSize의 감소를 중단한다.
💡 inSampleSize를 2의 제곱으로 증가시키는 이유는 decoder가 최종적으로 inSampleSize를 2의 제곱으로 반올림해서 사용하기 때문이다.

3. 이미지 resize 및 로딩 전체 코드

imageView.setImageBitmap(
        decodeSampledBitmapFromResource(resources, R.id.myimage, 100, 100)
)

fun decodeSampledBitmapFromResource(
        res: Resources,
        resId: Int,
        reqWidth: Int,
        reqHeight: Int
): Bitmap {
    val options = BitmapFactory.Options()
    options.inJustDecodeBounds = true
    BitmapFactory.decodeResource(res, resId, options)

    // Calculate inSampleSize
    inSampleSize = calculateInSampleSize(this, reqWidth, reqHeight)
    options.inJustDecodeBounds = false

    // Decode bitmap with inSampleSize set
    return BitmapFactory.decodeResource(res, resId, options)
}

참조

결과 미리보기

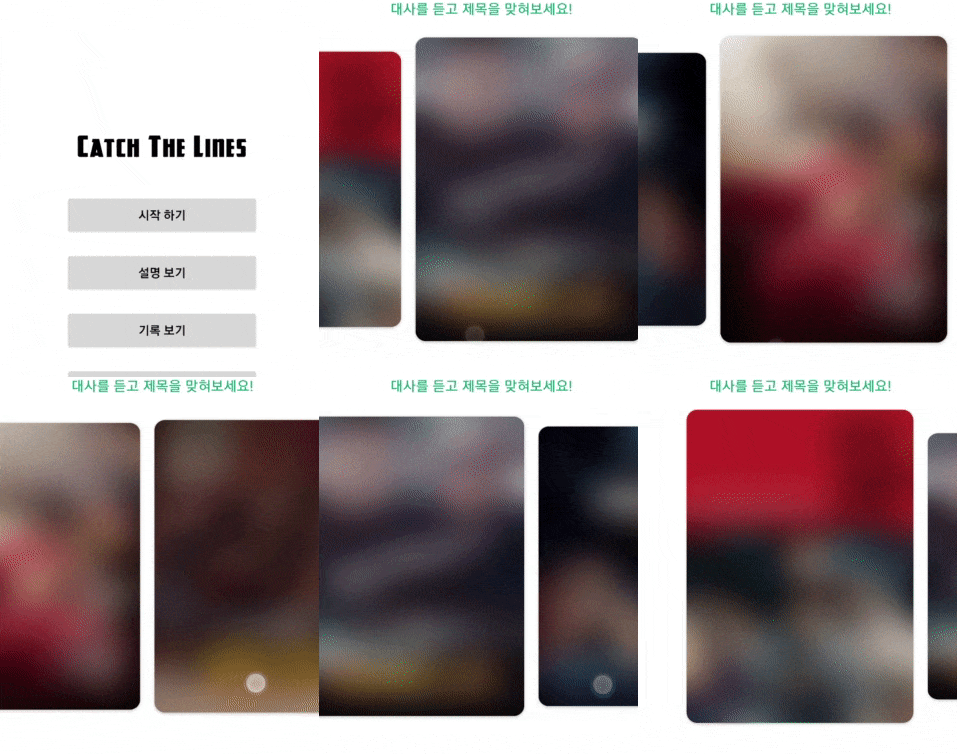
뷰페이저 미리보기 + 애니메이션

1. 가운데 페이지(currentItem)의 width 설정하기

ViewPager2로 좌우 미리보기를 구현할 때, ViewPager2의 width는 가운데 페이지가 차지하는 너비가 된다. 그럼 좌우 페이지는 어떻게 되는 걸까? 일단 계속 따라가보자. 

<androidx.viewpager2.widget.ViewPager2
    android:id="@+id/view_pager_poster"
    android:layout_width="0dp"
    android:layout_height="0dp"
    android:clipChildren="false"
    app:layout_constraintWidth_percent="0.725"
    app:layout_constraintEnd_toEndOf="parent"
    app:layout_constraintHeight_percent="0.45"
    app:layout_constraintStart_toStartOf="parent"
    app:layout_constraintTop_toBottomOf="@id/tv_hint" />

ConstraintLayout을 사용해서 width를 전체 레이아웃의 72.5%로 설정했다.

2. 좌우에 페이지가 보이도록 설정하기

2-1. clipChildren="false"

ViewPager2 속성 중 clipChildren="false"가 눈에 띈다. 문서에 "Defines whether a child is limited to draw inside of its bounds or not."라고 설명되어 있다. Child가 그려지는 공간을 ViewGroup의 영역 내로 제한할 것인지를 의미한다. 기본 값은 true이며, 제한한다는 뜻이다.

False로 설정하면 ViewPager2의 영역을 넘어 양쪽에 페이지가 그려질 수 있다.


(비슷한 속성으로 clipToPadding이 있는데, 자식 뷰의 영역을 ViewGroup의 padding 안쪽으로 제한할 것인지를 묻는다. 기본 값은 true이며, 자식 뷰의 그림자 같은 모서리 효과도 패딩에 의해 잘리게 된다.)

2-2. offscreenPageLimit

clipChildren="false"를 설정해고 어댑터에 데이터를 연결해도 양쪽에 페이지가 보이지 않는다. 왜냐면 ViewPager 하위 View 계층에 child가 하나씩만 유지되기 때문이다. 슬라이드를 하면 다음 View가 계층에 추가되고, 이전 View는 사라진다. (Adapter의 ViewHolder는 남아있다)


이럴 때 offscreenPageLimit 속성을 사용한다. offscreenPageLimit는 현재 페이지에서 좌우(상하) 각각 몇 개의 View를 유지할 것인지 결정한다. 화면에 보이지 않더라도 View가 생성되어 ViewPager2 하위 계층에 추가된다.

binding.viewPagerPoster.offscreenPageLimit = 2

현재 페이지를 제외하고 왼쪽에 2개, 오른쪽에 2개의 페이지가 미리 로딩된다.


여기까지 하면 이런 화면을 볼 수 있다.

좌우 미리보기

3. 좌우 여백 두기

딱 붙어 있는 게 별로라서 페이지의 좌우에 여백을 두려고 한다. ViewPager의 MarginPageTransformer를 활용한다. 문서에는 아래와 같이 쓰여있다.

Adds space between pages via the ViewPager2.PageTransformer API.
Internally relies on View.setTranslationX and View.setTranslationY.
// ...
public MarginPageTransformer(@Px int marginPx) { /*..*/ }

여백을 두는 API이고, 내부적으로는 translation 속성을 사용한다고 한다. PagerTransformer는 페이지를 슬라이드 할 때마다 동작하는데, 슬라이드 할 때마다 각 View의 좌표를 원래 위치에서 Margin만큼 이동시키는 듯 하다.

binding.viewPagerPoster.setPageTransformer(
	MarginPageTransformer(
		resources.getDimensionPixelOffset(R.dimen.game_poster_margin)
    )
)

4. 확대/축소 애니메이션 적용하기

이번에도 PageTransformer를 사용한다. PageTransformer는 슬라이드 할 때마다 동작하고, 좌우 페이지가 현재 페이지로 슬라이드 되면 확대하고 좌우 페이지로 이동하면 축소해야 하기 때문이다.

MarginPageTransformer도 사용해야 해서, 여러 PageTransformer를 혼합할 수 있는 CompositePageTransformer를 사용한다. 

CompositePageTransformer().also {
    it.addTransformer(
        MarginPageTransformer(resources.getDimensionPixelOffset(R.dimen.game_poster_margin))
    )
    it.addTransformer { eachPageView: View, positionFromCenter: Float ->
        val scale = 1 - abs(positionFromCenter)
        eachPageView.scaleY = 0.85f + 0.15f * scale
    }
}

2번째의 addTransformer 문장이 확대/축소 애니메이션이다.

  • positionFromCenter: 가운데(current) 페이지와의 상대적 위치를 뜻한다. 0이면 가운데 페이지, -1이면 왼쪽으로 페이지 하나만큼, +1이면 오른쪽으로 페이지 하나만큼 떨어져 있음을 의미한다. 따라서, 페이지의 위치가 가운데와 가까워질수록 abs(positionFromCenter) = 0에 가까워진다.
  • val scale = 1 - abs(positionFromCenter): 가운데 페이지에 가까워질수록 1, 멀어질수록 0, 더 멀어지면 음수가 된다
  • eachPageView.scaleY = 0.85f + 0.15f * scale: 가운데 페이지는 1, 좌우 페이지는 0.85의 scale을 갖게 된다. 따라서, 미리 보이는 좌우 페이지는 85%만큼 작게 보이며, 가운데로 슬라이드 될수록 1로 커진다.

5. ViewPager2 최종 코드

<androidx.viewpager2.widget.ViewPager2
            android:id="@+id/view_pager_poster"
            android:layout_width="0dp"
            android:layout_height="0dp"
            android:clipChildren="false"
            app:layout_constraintWidth_percent="0.725"
            app:layout_constraintEnd_toEndOf="parent"
            app:layout_constraintHeight_percent="0.45"
            app:layout_constraintStart_toStartOf="parent"
            app:layout_constraintTop_toBottomOf="@id/tv_hint" />

binding.viewPagerPoster.run {
    removeOverScroll()
    adapter = Adapter()
    offscreenPageLimit = 2
    setPageTransformer(buildPageTransformer())
	registerOnPageChangeCallback(onPageChange)
}

private fun buildPageTransformer() = CompositePageTransformer().also {
    it.addTransformer(
        MarginPageTransformer(resources.getDimensionPixelOffset(R.dimen.game_poster_margin))
    )
    it.addTransformer { eachPageView: View, positionFromCenter: Float ->
        val scale = 1 - abs(positionFromCenter)
        eachPageView.scaleY = 0.85f + 0.15f * scale
    }
}

6. 결과

뷰페이저 미리보기 + 애니메이션


안녕하세요, 이륙사입니다.

최근에 프로그래머스 과제관에서 연습을 하던 중 문자열로된 url을 Bitmap으로 변환해야 하는 일이 있었습니다. 간단하지만 공유하면 좋을 것 같아서 포스팅하려고 합니다.

1. URL -> InputStream -> Bitmap 변환

URL을 InpustSream으로 바꾸는 부분이 핵심입니다.

방법1) URL.openstream() 사용

private fun convertStringToBitmap(urlString: URL): Bitmap {
    val inputStream = url.openStream()
    return BitmapFactory.decodeStream(inputStream) // Bitmap
}

방법2) HttpURLConnection 사용

private fun convertUrlToBitmap(url: URL): Bitmap {
    val connection = url.openConnection() as HttpURLConnection
    connection.doInput = true
    connection.connect()

    return BitmapFactory.decodeStream(connection.inputStream)
}

2. ImageView에 적용

fun setImageFromUrl(imageView: ImageView, urlString: String) {
    val url = URL(urlString)
    val bitmap = convertUrlToBitmap(url)
    imageView.setImageBitmap(bitmap)
}

이렇게 하면.. 짠! NetworkOnMainThreadException가 발생합니다. url의 stream을 여는 과정에서 네트워크가 사용되는데, 이것을 메인 스레드에서 동작시켰기 때문입니다. 저는 코루틴을 통해 백그라운드 스레드에서 동작시켜 이를 해결하겠습니다.

fun setImageFromUrl(imageView: ImageView, urlString: String) {
   GlobalScope.launch(Dispatchers.IO) { // 백그라운드 스레드
      val url = URL(urlString)
      val bitmap = convertUrlToBitmap(url)
      imageView.setImageBitmap(bitmap)
   }
}

그리고 동작시켜보면 또 에러가 납니다..ㅋㅋㅋ imageView를 백그라운드 스레드에서 변경하려고 했기 때문이죠. 이것만 메인 스레드에서 동작시키면 정말로 끝이 납니다.

fun setImageFromUrl(imageView: ImageView, urlString: String) {
   GlobalScope.launch(Dispatchers.IO) {
      val url = URL(urlString)
      val bitmap = convertUrlToBitmap(url) // 네트워크는 백그라운드 스레드에서,
      withContext(Dispatchers.Main){ // UI는 메인 스레드에서
         imageView.setImageBitmap(bitmap)
      }
   }
}

최종 코드

GlobalScope.launch(Dispatchers.IO) {
    try {
        val url = URL(urlString)
        val bitmap = convertUrlToBitmap(url)

        withContext(Dispatchers.Main) {
            completed(bitmap)
        }
    } catch (e: Exception) {
        // 에러 처리
    }
}


+ Recent posts